Seafood processors face a unique set of packaging challenges. Fatty fish are prone to lipid oxidation, producing rancid odours; during frozen storage, sublimation of ice crystals causes “freezer burn” that dries out the flesh and ruins texture; upon thawing, excessive drip loss affects both appearance and shelf life; and sharp fins, spines, and shells threaten to puncture the vacuum bag – a single breach compromises the entire preservation effort.
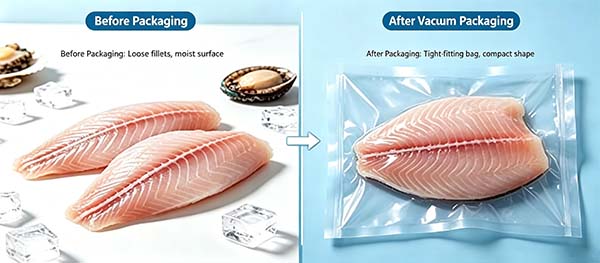
Vacuum packaging is the most effective solution. When combined with proper techniques, a vacuum packing machine can extend the refrigerated shelf life of fresh seafood from 2 days to over 10 days, and frozen storage up to 12 months while maintaining near‑fresh quality. This guide covers best practices for whole fish, fillets, shrimp, and shellfish, along with essential machine features and sanitation protocols.
Prevents lipid oxidation – Oily fish like salmon and mackerel contain high levels of polyunsaturated fatty acids that oxidize rapidly in air. Vacuum packaging removes oxygen, effectively slowing oxidative rancidity and preserving natural flavour and colour.
Prevents freezer burn – Freezer burn occurs when moisture sublimates from the surface of frozen food, leaving dry, discoloured patches. By creating an airtight barrier, vacuum packaging eliminates the primary cause of freezer burn.
Inhibits histamine formation – Certain fish can produce histamine under improper storage. Research confirms that vacuum packaging combined with strict temperature control significantly delays histamine build‑up. Vacuum packaging does not replace refrigeration – low temperature remains the critical factor.
Extends refrigerated shelf life – Studies show that vacuum‑packed silver carp fillets can last 9‑11 days vs. 6 days in air; salted and vacuum‑packed mullet fillets remain acceptable for up to 27‑30 days under chill conditions.
Challenge: Fins, vertebrae, and gill covers can easily puncture the bag, causing a slow leak that destroys the vacuum.
Solutions:
Use heavy‑duty bags – Standard bags (80‑100 µm) are insufficient. For whole fish, choose bags of at least 120 µm thickness; 150 µm and even 175 µm co‑extruded bags offer maximum puncture resistance.
Add a protective layer – Wrap the fish in a sheet of PE foam or food‑grade absorbent paper before bagging. This creates a cushion that distributes pressure away from sharp points.
Orient the fish correctly – Place the fish back‑side down, belly up. The belly is softer and less likely to puncture the bag, while the stiffer dorsal fin faces upward and has minimal contact with the film.
Choose dual‑seal machines – A vacuum sealer with two sealing bars creates a redundant seal. If the first seal is compromised by a micro‑puncture, the second seal maintains vacuum integrity.
Challenge: Fillets are delicate and can be crushed or deformed under high vacuum; multiple fillets often freeze together, making separation difficult.
Use non‑stick bags or interleaving paper – Place a sheet of waxed or non‑stick paper between each fillet. Some bags feature an inner anti‑stick coating – these are also effective.
Reduce vacuum level – For thin fillets, set the vacuum to ~85% rather than 100% to avoid over‑compression. Most commercial vacuum sealers allow adjustable vacuum pressure – use this feature wisely.
Pre‑freeze before vacuum packaging – This is a critical tip for maintaining shape. Arrange fillets in a single layer, wrap loosely in plastic film, and freeze for 3‑4 hours until they are firm on the surface. Then vacuum‑pack – the pre‑hardened fillets resist crushing and lose less moisture during the evacuation process.
Pat dry thoroughly – Use paper towels to remove all surface moisture before bagging. Excess water will be drawn into the vacuum pump and may contaminate the sealing area, causing weak seals. Never rinse fillets immediately before packaging – added moisture only worsens the problem.
Peeled shrimp are ideal for vacuum packaging. A light salt treatment is recommended – studies show that saline‑treated shrimp exhibit better freeze‑thaw stability, reduced drip loss, and lower lipid oxidation during frozen storage. Vacuum‑packed shrimp can maintain high quality for over 12 months in the freezer.
For shell‑on shrimp, be aware that sharp edges can puncture bags – use heavy‑duty film and consider adding a protective wrap.
CRITICAL WARNING: Live shellfish must NEVER be vacuum‑packed! In anaerobic conditions, they suffocate and die, posing serious food safety risks. Only pack the shucked meat after removal from the shell.
For oysters, it is common practice to steam them briefly, cool, then shuck and vacuum‑pack the meat. This ensures safety and extends shelf life.
These are best cooked first, cooled completely, and then vacuum‑packed with the shell on. Pay attention to sharp claws and leg spikes – wrap these areas with extra padding or use thick puncture‑resistant bags.
Seafood naturally releases liquid upon thawing. This “drip” can accumulate inside the bag, spoiling appearance and increasing the risk of seal failure.
Place a food‑grade absorbent pad inside the bag before sealing. These pads can absorb 5‑10 mL of liquid, keeping the product dry and presentable. Position the pad under the fish or fillet, not on top, to maximize contact with draining juices.
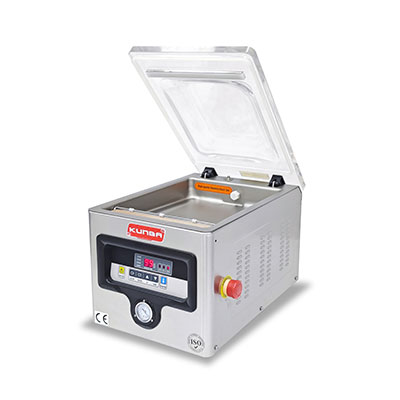
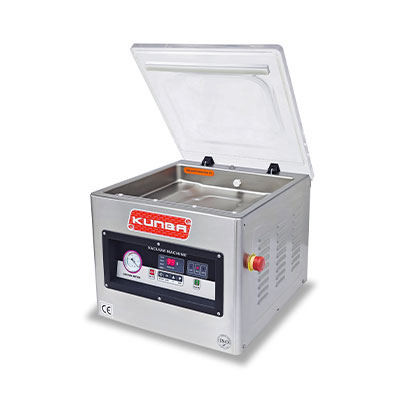
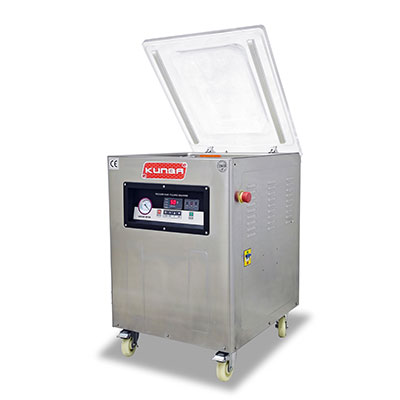
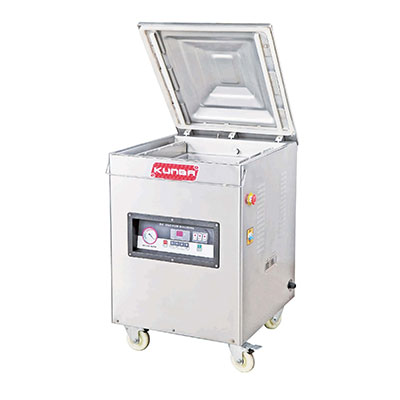
Not every vacuum sealer is suitable for seafood. Look for these essential features:
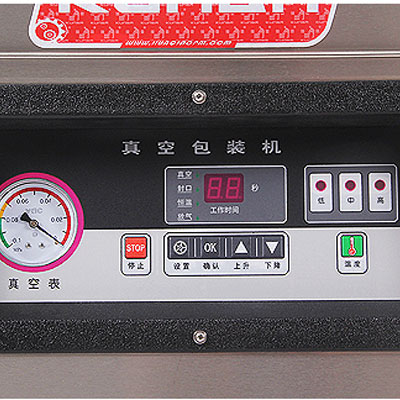
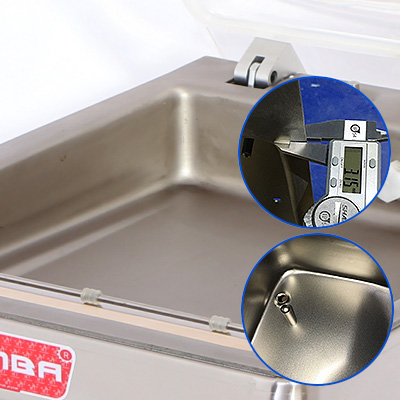
Stainless steel chamber – Must be corrosion‑resistant. Seawater and fish juices are highly corrosive; a 316 stainless steel chamber offers the best durability.
Tilted chamber floor – A sloped bottom directs liquids toward a drainage outlet, preventing them from pooling around the sealing bars.
Removable sealing bars – For daily cleaning and quick replacement – a must in high‑throughput operations.
Dual‑seal function – As mentioned, provides redundancy against puncture‑induced leakage.
Oil‑sealed vacuum pump – Delivers stronger, more reliable vacuum than oil‑free pumps, but requires regular oil checks (see sanitation protocol).
Seafood processing demands rigorous hygiene. At the end of each shift:
Wipe down the chamber interior with a diluted bleach solution (200 ppm) – this kills bacteria and removes organic residues.
Rinse thoroughly with clean water to remove any bleach residue.
Dry completely with a clean, lint‑free cloth – moisture promotes bacterial growth and corrosion.
Check the vacuum pump oil – Seawater vapour can contaminate the oil, turning it milky white. If this occurs, change the oil immediately to avoid pump damage.
Inspect seals and gaskets for wear – replace as needed.
No – live oysters must be shucked first. Vacuum packaging live oysters kills them and creates safety hazards. Only pack the shucked meat, preferably after a brief steam treatment.
Properly vacuum‑packed fatty fish can maintain high quality for up to 12 months at -18°C. Lean fish can last even longer – up to 18 months – without significant freezer burn or quality loss.
Not necessarily. Skin acts as a natural barrier and can protect the flesh. However, if the skin is very fatty (e.g., mackerel), ensure the bag is fully sealed and there are no sharp scales that might puncture the film. For fillets, skin‑on or skin‑off both work well – just follow the guidelines for drying and pre‑freezing.
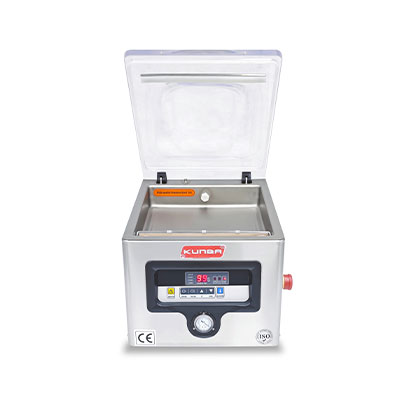
For small‑scale operations, a high‑quality chamber sealer with the features listed above is recommended. Household edge‑sealers often cannot handle the moisture and sharp bones; they also lack the durability and hygiene required for daily seafood processing.
Vacuum packaging is transformative for seafood processing, but success depends on mastering the details – from bag selection and product orientation to sanitation and machine maintenance. The key takeaways are puncture prevention and hygienic design. By following these best practices, you can significantly reduce waste, improve product quality, and extend shelf life, all while meeting the highest food safety standards.
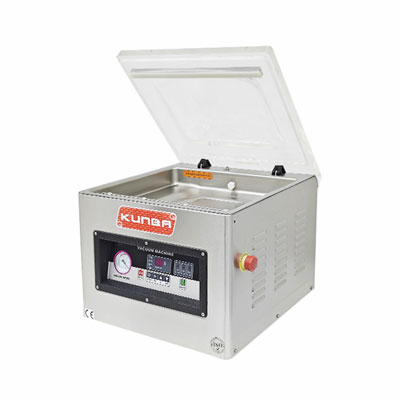
KUNBA offers specialised seafood‑grade vacuum packaging machines featuring full 316 stainless steel chambers, tilted drainage floors, and dual‑seal technology – built specifically to handle the demands of fish, shrimp, and shellfish processing. Contact us to learn more about our range of corrosion‑resistant, easy‑to‑clean solutions.

GET A QUOTE