You just ran a batch of vacuum-sealed products. Five minutes later, the bags are loose, air has crept back in, and your product is already at risk of spoilage or oxidation. A vacuum packaging machine that won’t hold vacuum is more than an annoyance—it’s a direct threat to product quality, shelf life, and customer trust.
The good news: most failures follow predictable patterns. In this guide, you’ll learn a systematic vacuum leak test procedure that isolates the root cause in minutes—without special tools. From bag issues to pump problems, we’ll walk through each step so you can restore full performance quickly.
Before replacing any parts, follow this logical sequence to narrow down where the vacuum is escaping.
Start here: Run a standard vacuum cycle with an empty chamber (no bag). Does the machine reach and hold the target vacuum?
If YES (holds vacuum empty, fails with a bag) → The issue is likely bag-related or seal bar-related.
If NO (fails even if empty) → The issue is internal: gasket, hoses, pump, or vacuum switch.
This simple distinction prevents hours of wasted effort. Now let’s fix it.
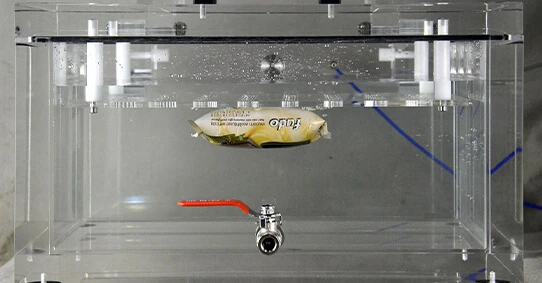
Over 50% of “not holding vacuum” complaints trace back to the bag itself—not the machine. Before touching your equipment, rule out bag failure.
Fill a sink or bucket with water.
Submerge a sealed bag (product inside, already vacuumed).
Gently squeeze the bag underwater.
What to look for: A continuous stream of tiny bubbles indicates a leak. Single bubbles at the seal edge suggest poor sealing; bubbles from the bag body mean pinholes or punctures.
| Symptom | Most Likely Cause |
|---|---|
| Bubbles from the seal edge | Moisture, powder, or food debris on the seal area |
| Bubbles from the bag body | Pinholes from sharp product edges (bones, shells, hard corners) |
| No bubbles, but the bag loses vacuum slowly | Poor seal due to insufficient seal bar temperature or time |
Debris on seal: Cut open, wipe bag interior clean, dry seal area, and re-seal.
Pinholes: Transfer product to a new bag; cushion sharp edges with a paper towel or secondary wrap.
Weak seal: Increase seal time or temperature slightly (refer to your machine’s manual).
Pro tip: Always double-seal the open end of bags containing liquids or fine powders.
If the bag is fine but the machine still won’t hold a vacuum, the next suspect is the chamber gasket. This rubber seal sits between the lid and the chamber base. Even a tiny crack or piece of debris breaks the vacuum.
Cracks or tears: Run your finger along the entire gasket. Any nick or split is a leak path.
Debris: Look for dried food, grease, or foreign material embedded in the seal surface.
Hardening: Press the gasket. It should feel pliable. Hard, brittle rubber no longer conforms to the chamber lip.
Lightly wet the gasket surface with water (or apply a thin layer of vacuum grease).
Close the chamber and start a vacuum cycle.
Watch for bubbles forming along the gasket edge.
If bubbles appear, clean the gasket thoroughly. If cracks or hardening are present, replace the chamber seal gasket immediately—this is a consumable part, not a repair.
Chamber sealer troubleshooting tip: Keep at least one spare gasket in your maintenance inventory. They degrade over time regardless of use.
A weak or dying pump is a common cause when the machine runs longer than usual but never reaches full vacuum, or reaches it but can’t sustain it.
Most industrial chamber sealers have a built-in vacuum gauge. If yours doesn’t, attach a portable vacuum gauge to the chamber port.
Close the empty chamber.
Start the vacuum pump.
How long does it take to reach maximum vacuum?
Normal performance:
Achieve a vacuum level of -0.8 bar or higher within 30 seconds.
Holds that level for at least 30 seconds after the pump stops.
If your vacuum pump is not pulling a full vacuum, investigate:
| Symptom | Likely Cause |
|---|---|
| Slow to pull, low max vacuum | Clogged intake filter or low oil level (oil-lubricated pumps) |
| Noisy pump, max vacuum drops gradually | Internal wear (vanes, piston rings, or cylinder) |
| Pump runs, but no vacuum at all | Broken coupling, blocked exhaust, or failed inlet valve |
Oil-lubricated pumps: Check oil level and color. Milky or black oil needs changing.
Filters: Clean or replace the intake air filter.
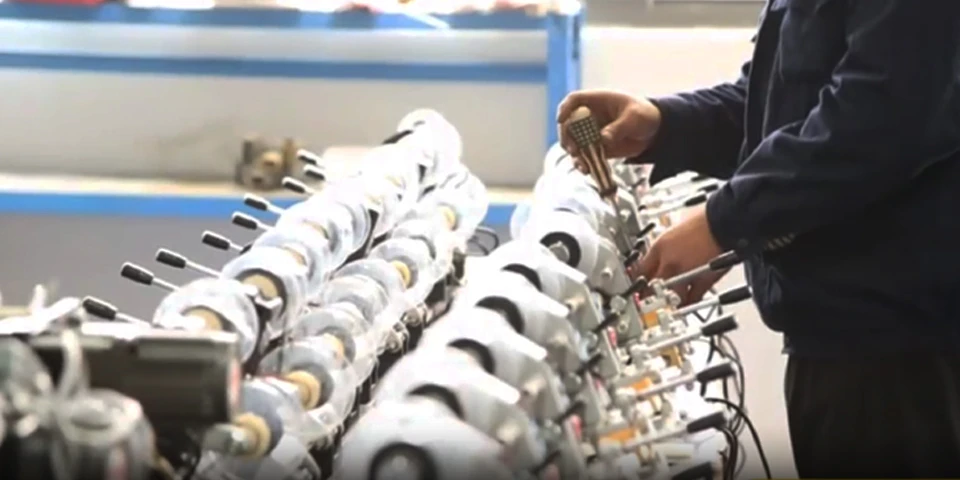
If internal wear is suspected: Contact a pump specialist or replace the pump—internal rebuilds require precision tools.
Warning: Only qualified electricians or trained maintenance personnel should remove the machine cover. Vacuum pumps and live electrical components pose serious hazards.
Once the cover is safely removed:
Visually inspect the rubber hose connecting the pump to the chamber.
Look for cracks, kinks, or abrasion points.
Check all barbed fittings and hose clamps for tightness.
Even a hairline crack in a vacuum hose will cause a slow leak that’s impossible to detect from outside.
Quick fix: Replace suspect hoses with identical vacuum-rated tubing. Do not use a standard air hose—it collapses under vacuum.
The vacuum switch (or pressure sensor) tells the control board when the target vacuum level is reached. When it fails, the machine behaves erratically.
Pump runs continuously (switch never signals “stop”)
Pump stops too early (switch triggers prematurely, leaving a weak vacuum)
Pump never starts (switch stuck open)
For technicians only: Temporarily bypass the vacuum switch with a jumper wire (consult your machine’s wiring diagram). If the pump now runs and holds a vacuum correctly, the switch is faulty.
Solution: Replace the vacuum switch with an identical OEM or compatible part. Do not operate the machine with a bypassed switch—it bypasses safety limits.
Consistent documentation helps spot recurring issues before they cause downtime. Use this simple log or create your own.
| Date | Machine ID | Fault Description | Steps Checked | Root Cause Found | Action Taken | Operator |
|---|---|---|---|---|---|---|
| 2025-XX-XX | Chamber 3 | Loses vacuum after 10 sec | Bag test, gasket, hoses | Cracked chamber gasket | Replaced gasket | J. Lee |
| 2025-XX-XX | Chamber 1 | Slow pump, max -0.6 bar | Pump oil, filter | Clogged intake filter | Cleaned filter, changed oil | M. Chen |
Pro tip: Store this log near the machine with a pen attached. A 30-second entry saves hours of re-diagnosis later.
A: Almost always a bag seal issue or chamber gasket leak. Run the submerged bag test first. If the bag is sound, check the gasket with the water test. Internal leaks (hoses, fittings) are less common but possible.
A: For daily production use: every 1–3 months or 150–200 operating hours. Change immediately if oil appears milky (moisture contamination) or black (carbon buildup). For light use (weekly), every 6 months is sufficient.
A: Yes—and this is the most overlooked cause. A pinhole in the bag allows air to slowly re-enter after sealing. The machine itself may be perfectly fine. Always test the bag first before touching the equipment.
80% of “not holding vacuum” complaints are solved by inspecting the bag and chamber gasket. Another 15% trace to pump maintenance (oil, filters). The remaining 5% involve internal hoses or the vacuum switch.
You’ve now walked through a complete vacuum leak test procedure:
Bag submersion test
Gasket visual + water test
Pump ultimate vacuum check
Internal hose inspection
Vacuum switch diagnosis
If you’ve completed all five steps and your vacuum packaging machine still won’t hold vacuum, the issue may require advanced diagnostics.
Need professional support? Contact KUNBA Technical Support – we offer remote diagnostics, genuine spare parts (gaskets, vacuum pump oil, switches), and next-day component shipping to minimize your downtime.

GET A QUOTE